
How to Install an Industrial Steam Iron
3000IS Professional Steam Iron Station – 1800W, Check The Price >>>
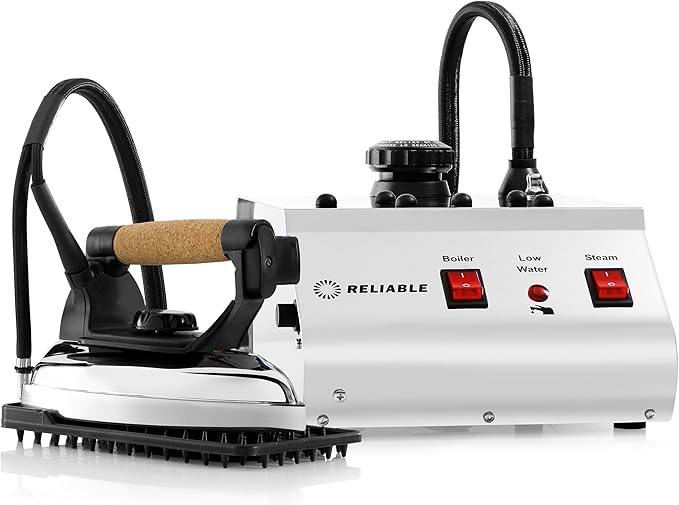
- Install the Hanger
First, install the hanger above the folding rod. Cut off the tie that holds the hanging rod, and pull the ironing lever upwards until it is fully extended and you hear a ‘click’ as the buckle locks. Once the installation is complete, you will see indicators on the two crossbars showing how to unlock them by rotating downward. These signs guide you in storing the ironing rod. Simply rotate the crossbars gently by hand in the direction of the indicator, and the hanging rod will easily fold away for convenient storage.
- Install the Garment Steamer
Insert the steam head plug into the socket on the main unit. When you hear a “click,” the plug is securely in place. Hang the steam head on the hanger when finished. To disassemble, press and hold the gray button and pull out the plug. Removal is simple and easy.
- Install the Brush Attachment
The brush attachment is designed for ironing wool and similar fabrics, helping steam penetrate more effectively for better results. To install it, hook the two bottom buckles of the triangular ironing head, then snap the top corner buckles into place. You will hear a “click” when it is securely attached. When ironing, gently glide the brush along the garment from top to bottom. Always release the steam switch completely before removing the brush to avoid burns.
How to Troubleshoot Common Issues with Industrial Steam Irons
- Iron Not Working
(1) If the iron doesn’t turn on, first check the power supply and cord for any issues. Then, inspect the power switch. Many switches have an indicator light that might turn on even if the switch itself is faulty, so use a multimeter to check if the switch is functioning properly. A common issue is contact oxidation, leading to poor electrical connection.
(2) If the power supply is fine, check the thermostat. Since thermostats regularly switch on and off, their contacts can burn out over time.
(3) If the thermostat is functioning normally, check the fuse. Always replace it with an over-temperature fuse. Do not use a different type of fuse or bypass it, as this could damage the heating element, deform the aluminum base, or even cause a fire.
(4) If all the above components are working, the heating element may be burned out. Use a multimeter to measure its resistance to determine if it’s defective.
- No Steam Ejected
(1) First, check if the water in the reservoir is below the minimum level or if the reservoir is installed incorrectly. Insufficient water or improper installation will prevent steam from being generated.
(2) If the water level is normal, inspect the solenoid valve and steam switch. If the steam switch has poor contact, the solenoid valve won’t function, and no steam will be produced. You may hear a faint “squeak” if the switch is faulty. In this case, replace the switch.
(3) If steam is still not ejecting, check for blockages or foreign objects in the valve. Use a multimeter to measure the coil resistance of the solenoid valve to determine if the coil is damaged.
- Water Leakage
(1) If water leaks from the steam iron, first ensure the iron has reached its operating temperature. If leakage occurs, adjust the thermostat to the appropriate setting.
(2) If the temperature is correct, inspect the Teflon plug in the valve core for wear, which could cause water to leak.
(3) If the Teflon plug is fine, check if the pressure spring has become deformed or softened, preventing proper steam control. Lastly, check the steam switch for a short circuit, which could cause the solenoid valve to remain open, leading to water leakage.