I. What is the Printing Principle of the Dot Matrix Printer?
The dot matrix printer is primarily employed for reproducing various documents and providing users with efficient services. It achieves functionalities that inkjet and laser printing technologies cannot. So, what is the principle behind the dot matrix printer?
The dot matrix printer employs a pressure-sensitive needle that strikes the carbon paper through the needle in the print head. During printing, the print needle protrudes, transferring the color of the ribbon onto the paper. The needle consistently applies pressure to the paper throughout the printing process. This pressure enables multi-layer carbon paper to produce the same effect. Consequently, not only does the top sheet display writing from the ribbon’s ink, but the lower layers of paper also simultaneously exhibit the writing, allowing for multiple printing.
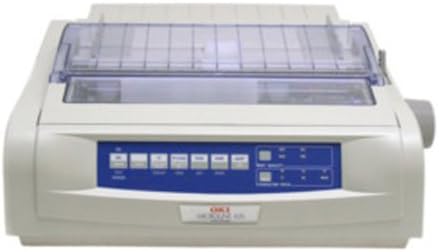
OKI 62418701 MICROLINE 420 Dot Matrix Printer, Check Price >>>
II. How to Resolve Issues Preventing Dot Matrix Printers from Printing
Dot matrix printers are convenient for printing various bills and multiple copies. However, issues preventing printing can arise. Several reasons may contribute to these failures, typically involving circuit problems. To troubleshoot and resolve the problem, follow these steps:
-
Begin by checking the power circuit. Ensure the connection between the board and the main board is correct, without any reversals, oblique connections, or virtual connections.
-
If the power circuit board’s connection to the main board is normal, verify the connection between the main board and the control panel. If abnormal, reconnect the connection.
-
If the main board and control panel connection is normal, inspect the power switch. Replace a damaged power switch.
-
If the power switch is normal, disconnect the power supply circuit board from the main board, connect to 220V, and use a multimeter to check the DC output voltage. If abnormal, the power circuit board is damaged. Check for a damaged switch and replace if necessary.
-
If the fuse F1 in the power circuit board’s primary circuit is blown, check for a short circuit in the remaining circuits. If none, replace F1.
-
If the fuse is normal, examine the switch tube, diode, and rectifier bridge circuit. Replace damaged components or the power circuit board.
-
Measure the power supply’s output voltage. Disconnect the motor, head, and sensor cables from the main board, leaving only the power circuit board and control panel cables connected. Power on to check if the control panel indicator displays power. If yes, the motherboard is normal, and the issue lies in peripheral electrical components.
-
Check peripheral electrical components. Inspect the carriage motor and paper feed motor for damage. Replace damaged motors. If motors are normal, check the print head cable for wear or disconnection. Replace if necessary. If the print head cable is normal, remove the print head, power on, and check for display. If powered, there’s a short circuit in the print head; replace the short-circuited parts or the print head. If the issue persists after removing the print head, check and replace the shorted sensor.
-
If the power indicator on the control panel doesn’t display, check for burnt chips on the motherboard. Replace damaged chips. If no burnt chips are found, measure the resistance of the 5V power supply on the motherboard to ground to identify a short circuit. If short-circuited, repair or replace the motherboard. If not, check the gate array, CPU, and other components for damage. Replace damaged components or, if none are found, replace the motherboard as a final resort.